This is the second part of the series Symfony2 Tutorial for Beginners which will describe the process of configuring Netbeans to work with the php framework Symfony2.
- Prerequisites
- Enabling Php in Netbeans
- Creating Symfony2 Project in Netbeans
- A short note on Symfony2 directory structure
- Configuring your Webserver
- Configure Symfony2
- Working with Netbeans and Symfony2
Prerequisites
Things that should already be up-and-running:
- Webserver (e.g. Apache)
- DBMS (e.g. mysql)
- Netbeans
Enabling Php in Netbeans
These are the steps for Netbeans 7.1.2, but for other versions they should be quite similar.
- Go to Tools -> Plugins -> Available Plugins-Tab and Search for php.
- Select PHP as well as PHP Symfony2 Framework
- Press Install and Restart Netbeans.
Creating Symfony2 Project in Netbeans
- Click on New Project and Select PHP -> PHP Application.
- Click Next.
- Choose a Project Name.
- Click Next.
- Click Next again (we did not need to change any of the settings)
- Select Symfony2 PHP Web Framework.
- If you have not already done it download the Symfony2 Standart Edition. You do not need to extract the .zip file.
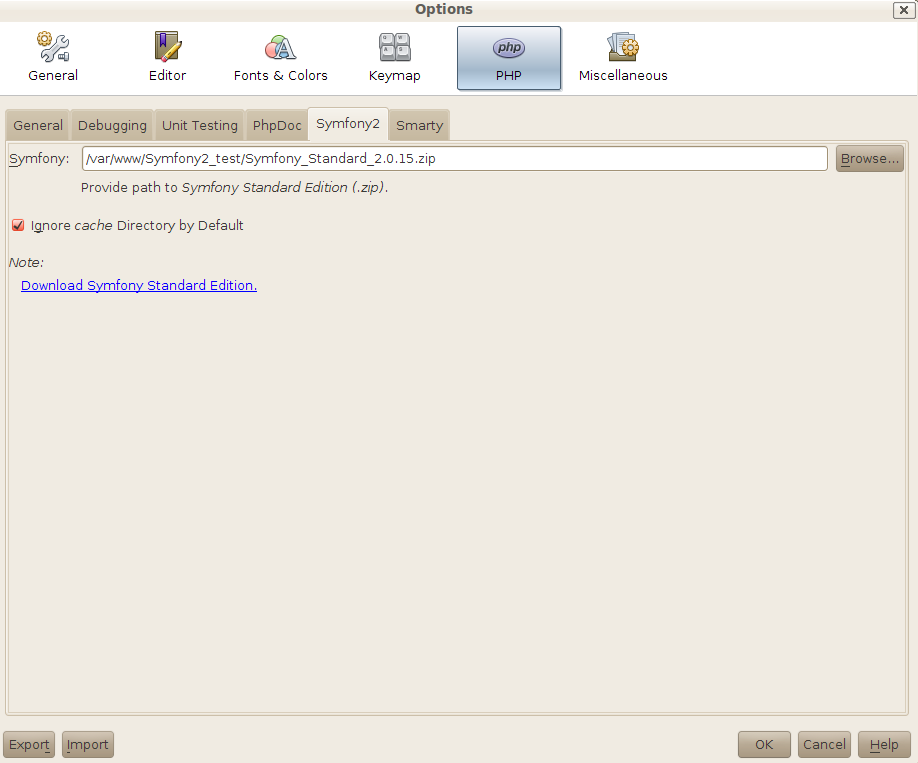
- At the 4. Step of the process of creating the new Netbeans project, click Options.
- The options window should be open on the php tab now.
 Under the Symfony2 tab, enter the path to the zip file of Symfony2 that you downloaded (e.g.
). I experienced some problems if I did not place the zip inside the project folder before creating the project, so I would suggest to do it that way./var/www/my_project/Symfony_Standard_2.0.15.zip
 - Click Finish
After this, the project should be created and a whole bunch of files and directories should already be in it.
A short note on Symfony2 directory structure
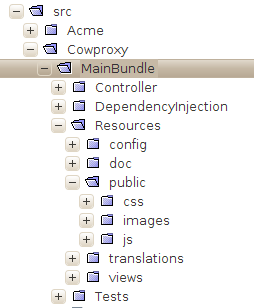
- /app: configuration files, logs, cache and such
- /src: the directory your code will be in. Most likely there will already be a demo inside it, feel free to delete that (but if you do, do it everywhere, otherwise you will get errors).
- /vendor: useful libraries, bundles, etc (if you are unsure, do not touch. Or make a backup before touching.)
- /web: web root directory

A more details explanation can be found on the symfony website.
Configuring your Webserver
Configure your webserver to your liking. You may want to define a local server name (do not forget to add it to your hosts file).
If you are running the apache webserver with default configuration and placed the Netbeans project inside the root web directory no further configuration will be needed.
Visit (or, if you did change/customize your configuration, the equivalent of)
You should see a Welcome message from Symfony and maybe a list of problems detected by it.
Try to resolve any major problems before continuing.
Configure Symfony2
open the file
If you now go to
Working with Netbeans and Symfony2
Congratulations on successfully (i hope) creating a Symfony2 project in Netbeans. I will leave you with some last remarks on how to work with Netbeans and Symfony2.
Executing Symfony2 Commands
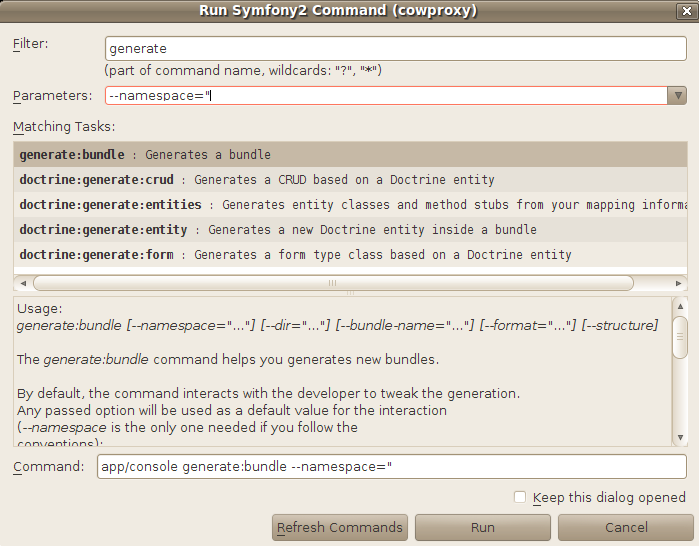
Left-Click on the Project -> Symfony2 -> Run Command
It is possible (and I would recommend doing it) to add a shortcut for this (tools -> options -> keymap tab -> search for symfony)
Of course, it is also possible to execute commands from the console:
If you know what you want to execute, this is simpler and faster (i think), but Netbeans supplies a list of all the commands and displays a short summary of them directly there, which is nice if you are not quite sure how to do something you want, or just want to browse and see whats possible.

Generating your first bundle
Creating a bundle will most likely be the first thing you will be doing, so open the “run command” window and select the “generate:bundle” option. In the parameter text-field add: “–namespace=”YourIdentifier/YourBundle” (“YourBundle” must end with the string “Bundle”) and run it. The program will ask you to give some more arguments, but you may just use the default it gives you (although you might want to say yes to the creation of the whole directory structure).
And that’s it for this part of my Symfony2 Tutorial. I hope everything worked for you right away, but if you do experienced some problems while setting Netbeans up for Symfony2, do not hesitate to ask in the comments.
The next part of this tutorial is: The first static Page – Routing, Templates, Twig
Overview over all parts: Symfony2 Tutorial for Beginners